
Uipath Certified RPA Associate Uirpa · Free Practice Question Easy
Question 26
Scenario: While working on a Studio project you need to add an activity to the workflow.
Which of the following is the best series of actions to facilitate this?
-
A
By right-clicking inside the workflow where we want to add the new activity and selecting Run to this Activity.
-
B
By clicking the Activities panel, selecting the needed activity from the Available activities or just search for the keyword inside the Search bar, then drag and drop it inside the workflow.
-
C
By clicking the Project panel, typing in the Search bar the keyword, then just drag and drop it in the workflow.
-
D
By clicking the Project panel, then just right-click inside it, click Add and select the needed activity.
Reveal correct answer
Correct answer: B
Explanation
To add an activity to the workflow, the best actions from the available options is clicking the Activities panel, selecting the needed activity from the Available activities or just search for the keyword inside the Search bar, then drag and drop it inside the workflow.
A workflow represents a relatively small piece of an automation project, typically executing a specific part of the process. Once built, it can be reused across different projects.
A workflow is made of Studio activities, interconnected through variables to form a routine. The routine typically has an input and an output. Basically, it defines the flow of automation. Hence the name, workflow.
UiPath Studio provides you with predefined workflow layouts to suit all the needs of a fast and reliable automation process.
The workflow layouts are:
Why is it important?
The fastest, most reliable, and useful way of automating a process is to break it down into smaller bits.
This allows for independent testing of components, enables team collaboration, and component reuse.
Hence, most of the automation projects require the use of multiple workflows that come together to provide a solid business automation solution.
The Simple Activity
Add the standard UiPath activity to your package

Intro
Now that you have your package created, let's add an activity to it! In this example, you will create the activity shown above: a simple one that adds two numbers together.
What You'll Need
Steps
1) Open the Activity Creator
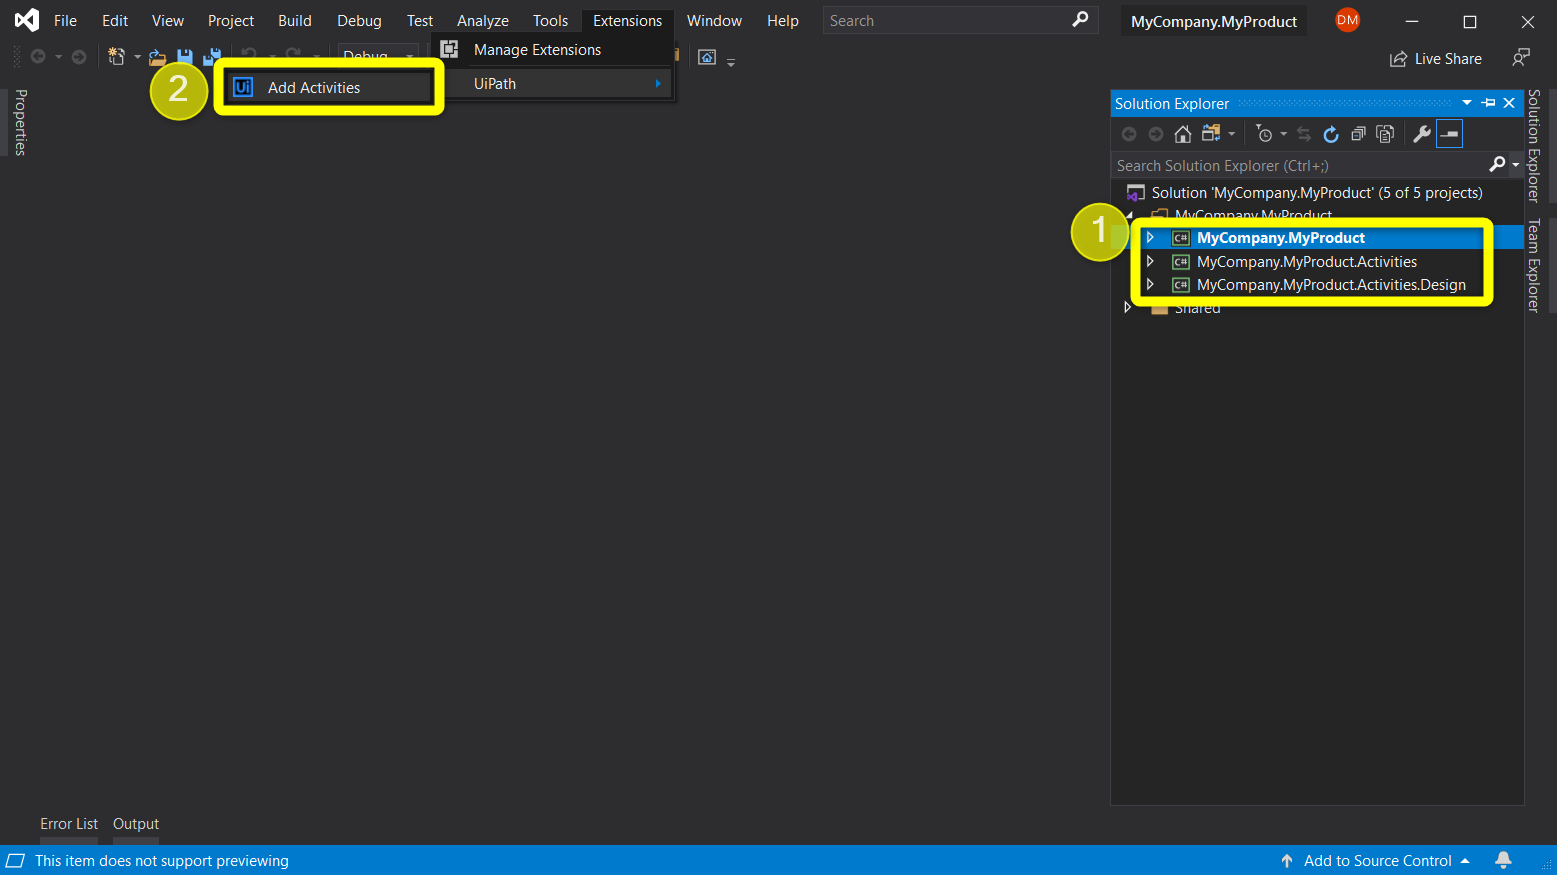
Start by opening the Visual Studio solution created in the previous section and select any of the main projects (these are the ones labeled MyCompany.MyProduct...) in the Solution Explorer. Then navigate to Extensions > UiPath > Add Activities in the toolbar. Note that this menu will be disabled until one of the projects is selected.
2) Build an Activity
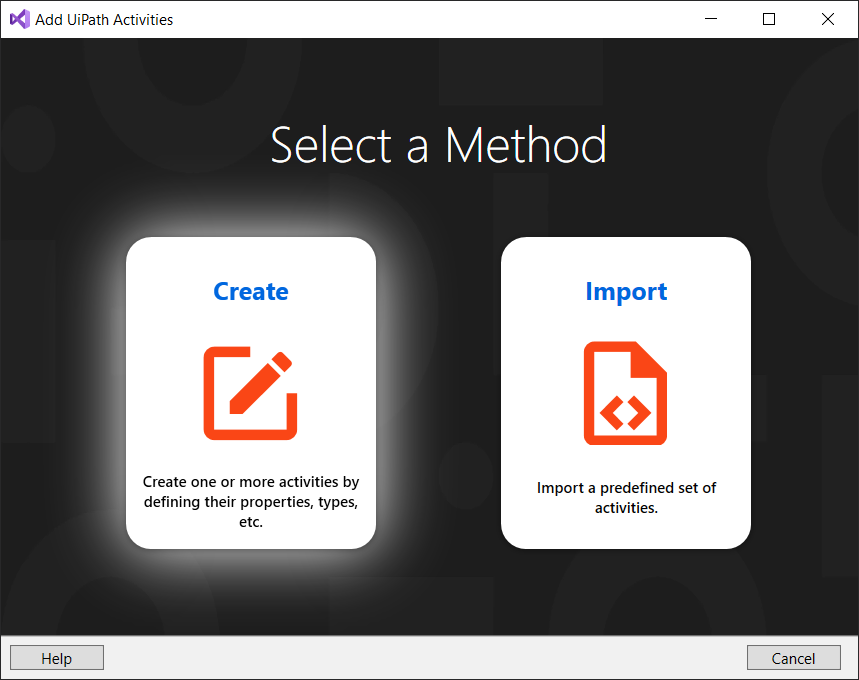
This will open a new Activity Creator window. The first screen gives you two options:
Create: Build one or more activities from scratch.
Import: Import a list of predefined activities that have been saved in a standard format.
For now, select Create.
3) Define the Activity
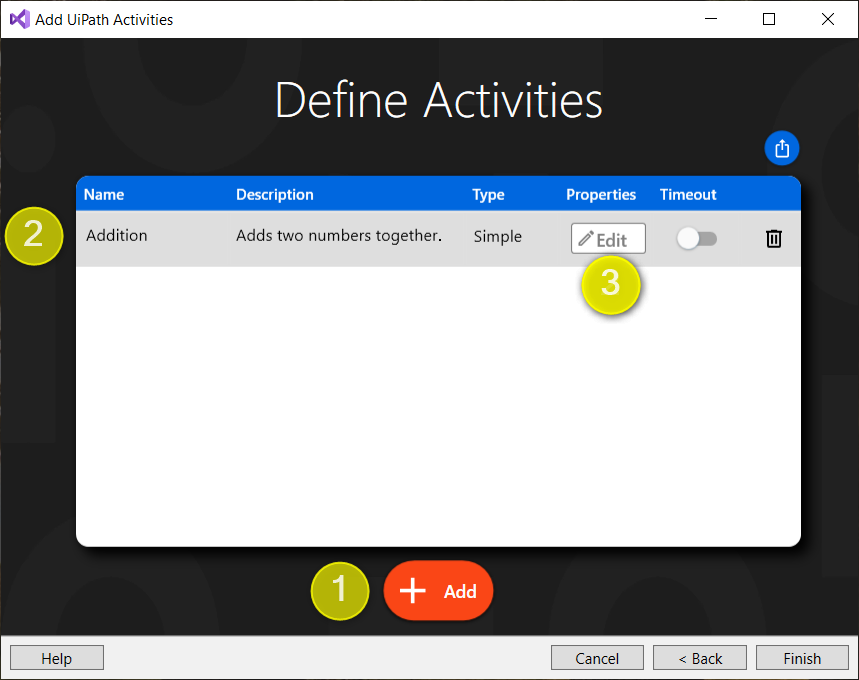
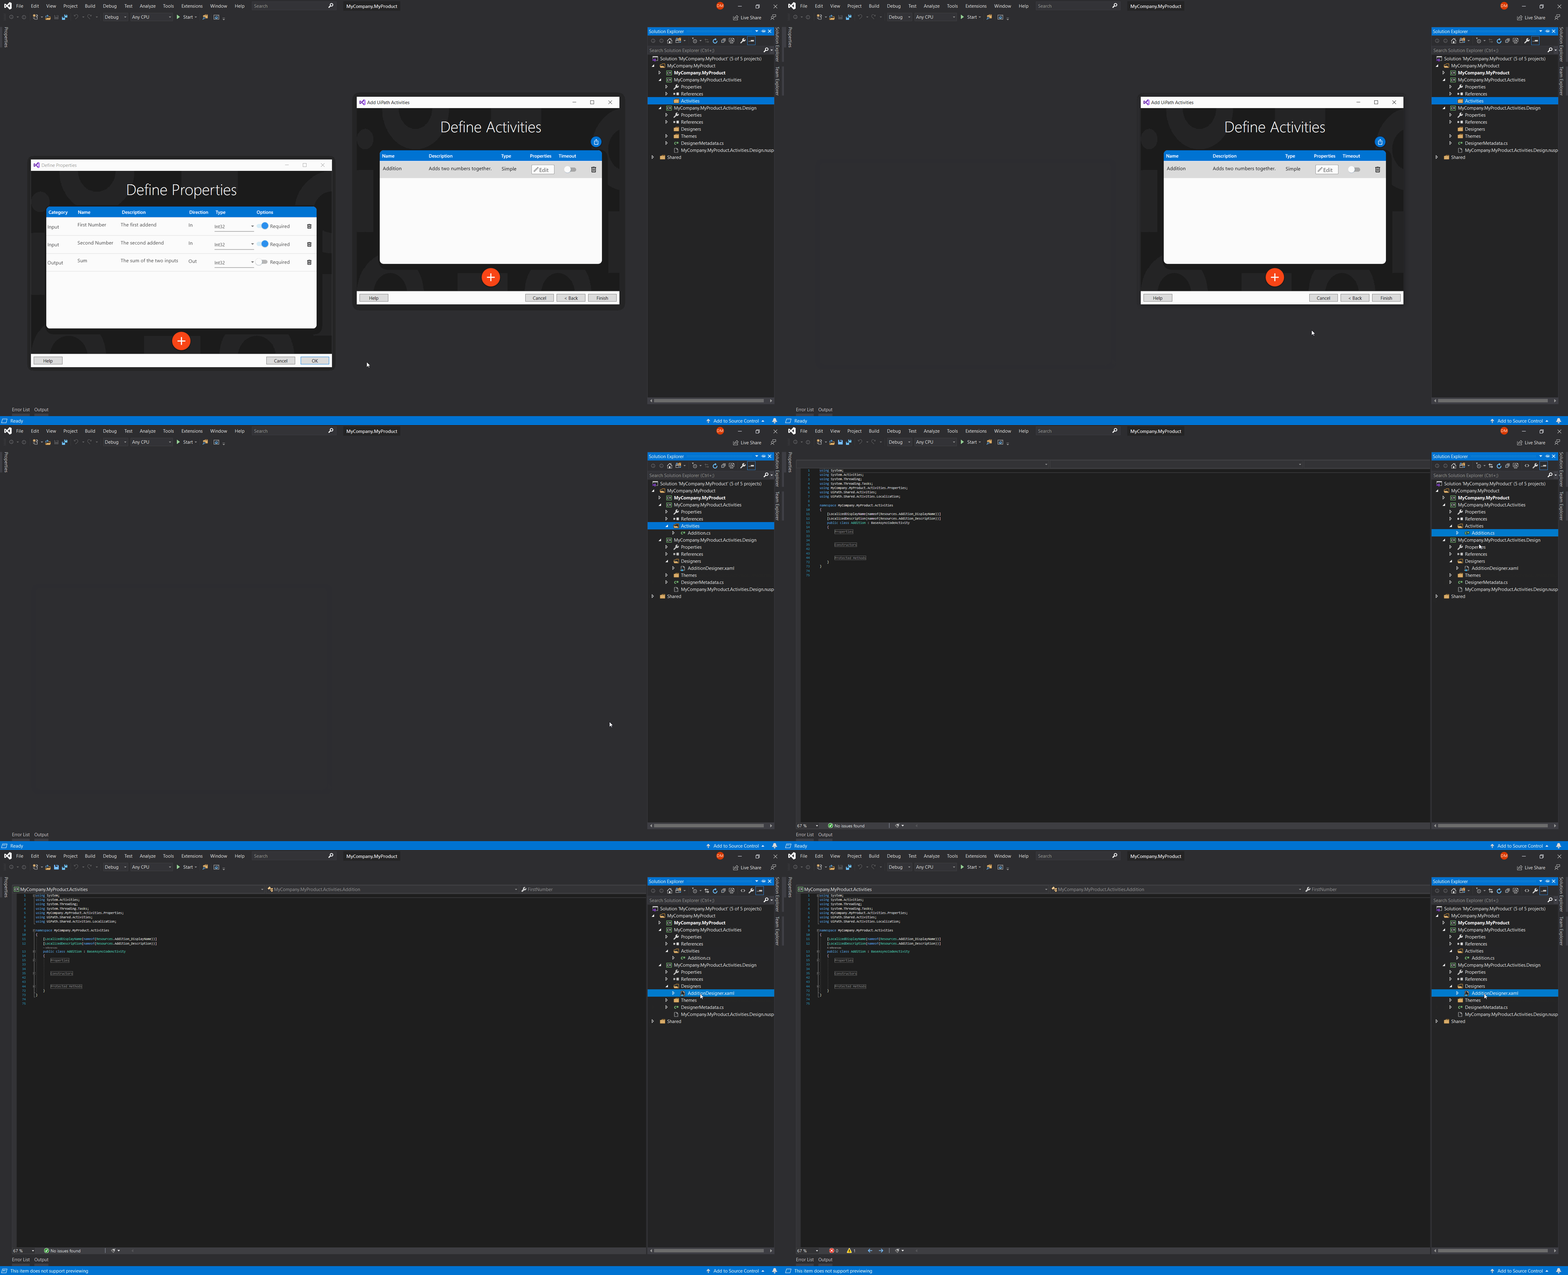
Click the Add button and fill in each field as shown below. This will prepare the creator to build an activity named Addition. When ready, click the Edit button to add properties to the Addition activity.
4) Add Properties
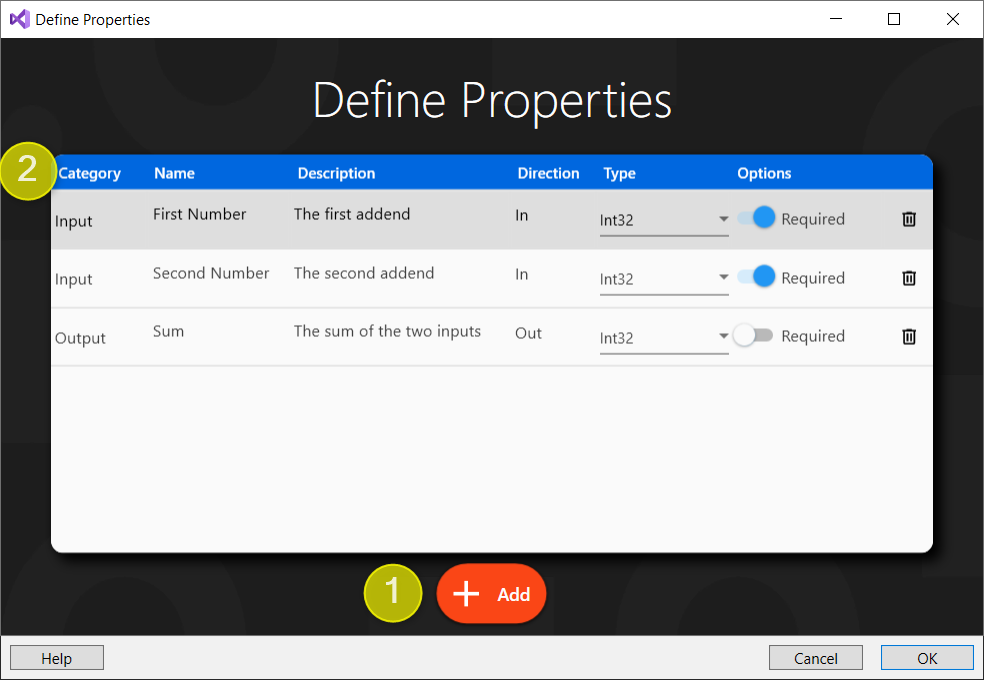
This will open a new Define Properties window. Use the Add button to create 3 properties as shown below.
Ensure that the first two are inputs and the last is an output. These properties will represent two numbers and their sum.
5) Generate the Activity
Click OK on the Properties window and Finish on the activities window. You will then see some new files added to your projects.
6) Add Functionality
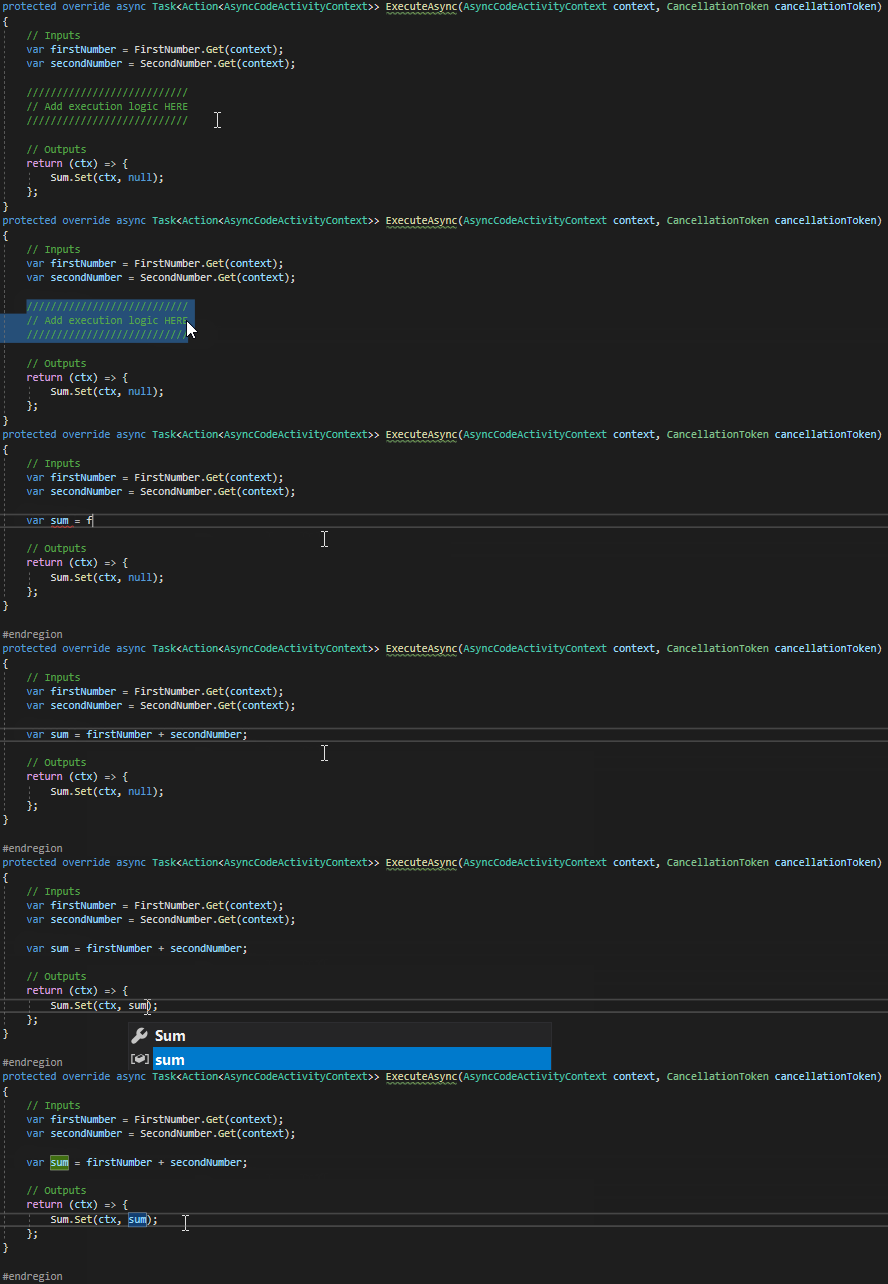
Open the Addition.cs file that was just created and expand the Protected Methods region within it to reveal the activity's ExecuteAsync method. This is the method that gets called whenever the activity is run in UiPath Studio.
Notice that the two inputs created in step 4 (First Number and Second Number) as well as the one output (Sum) have already been added to this method. The final step is to bridge the gap between them by replacing the comment block with code that adds the two inputs and then sets the result to Sum. See below:
7) Build the Package
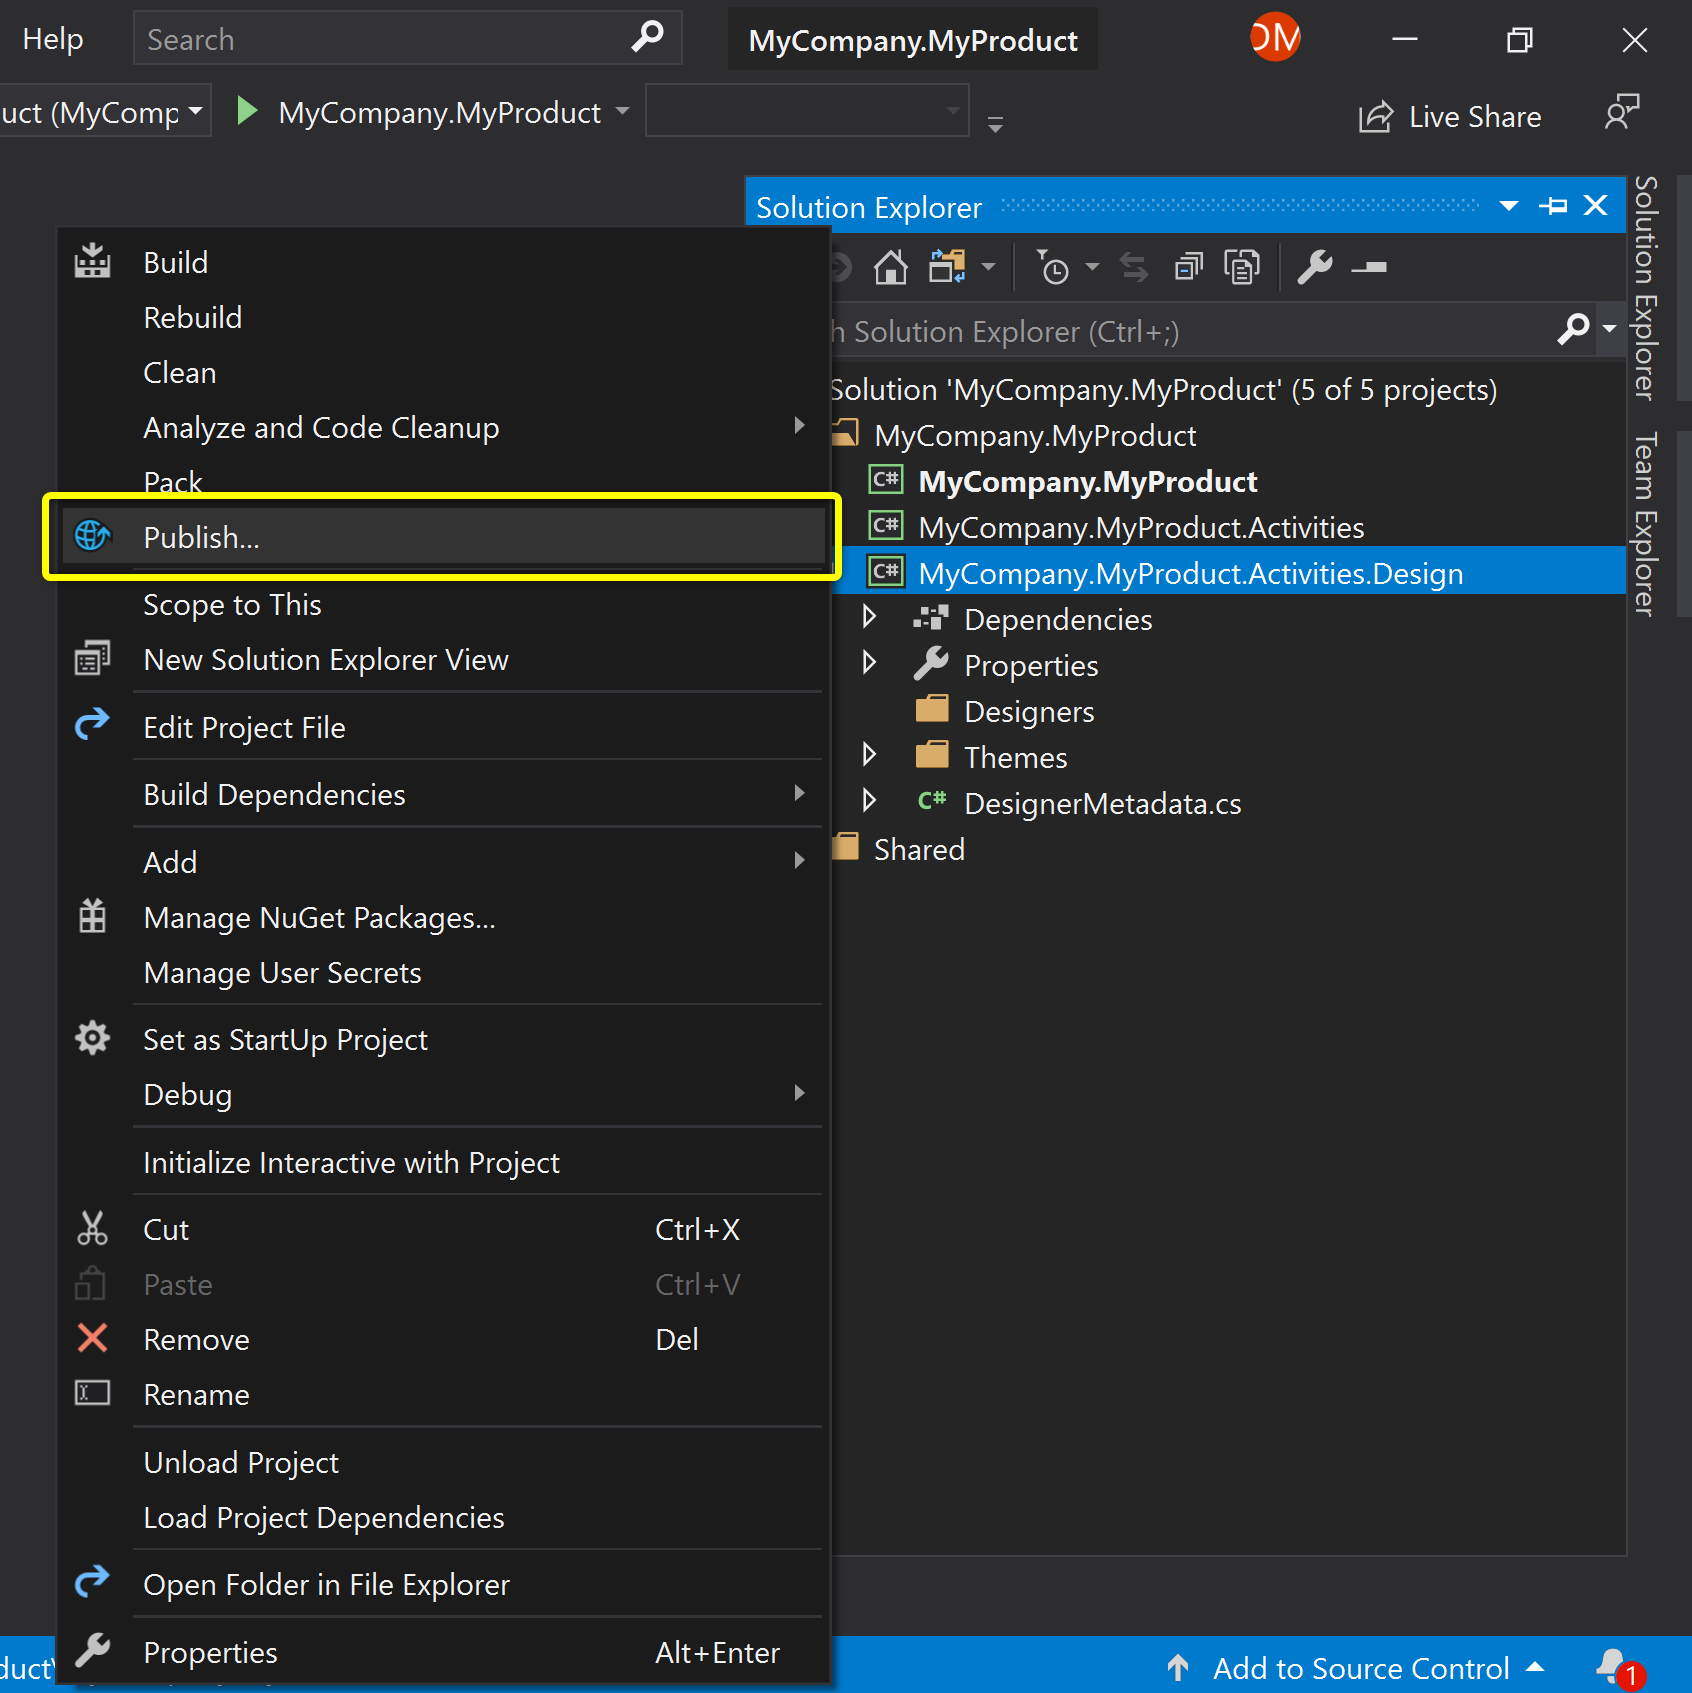
Within the Solution Explorer, right-click your Design project and select Publish. This option builds your projects, packages them together, and sends the package wherever you'd like.
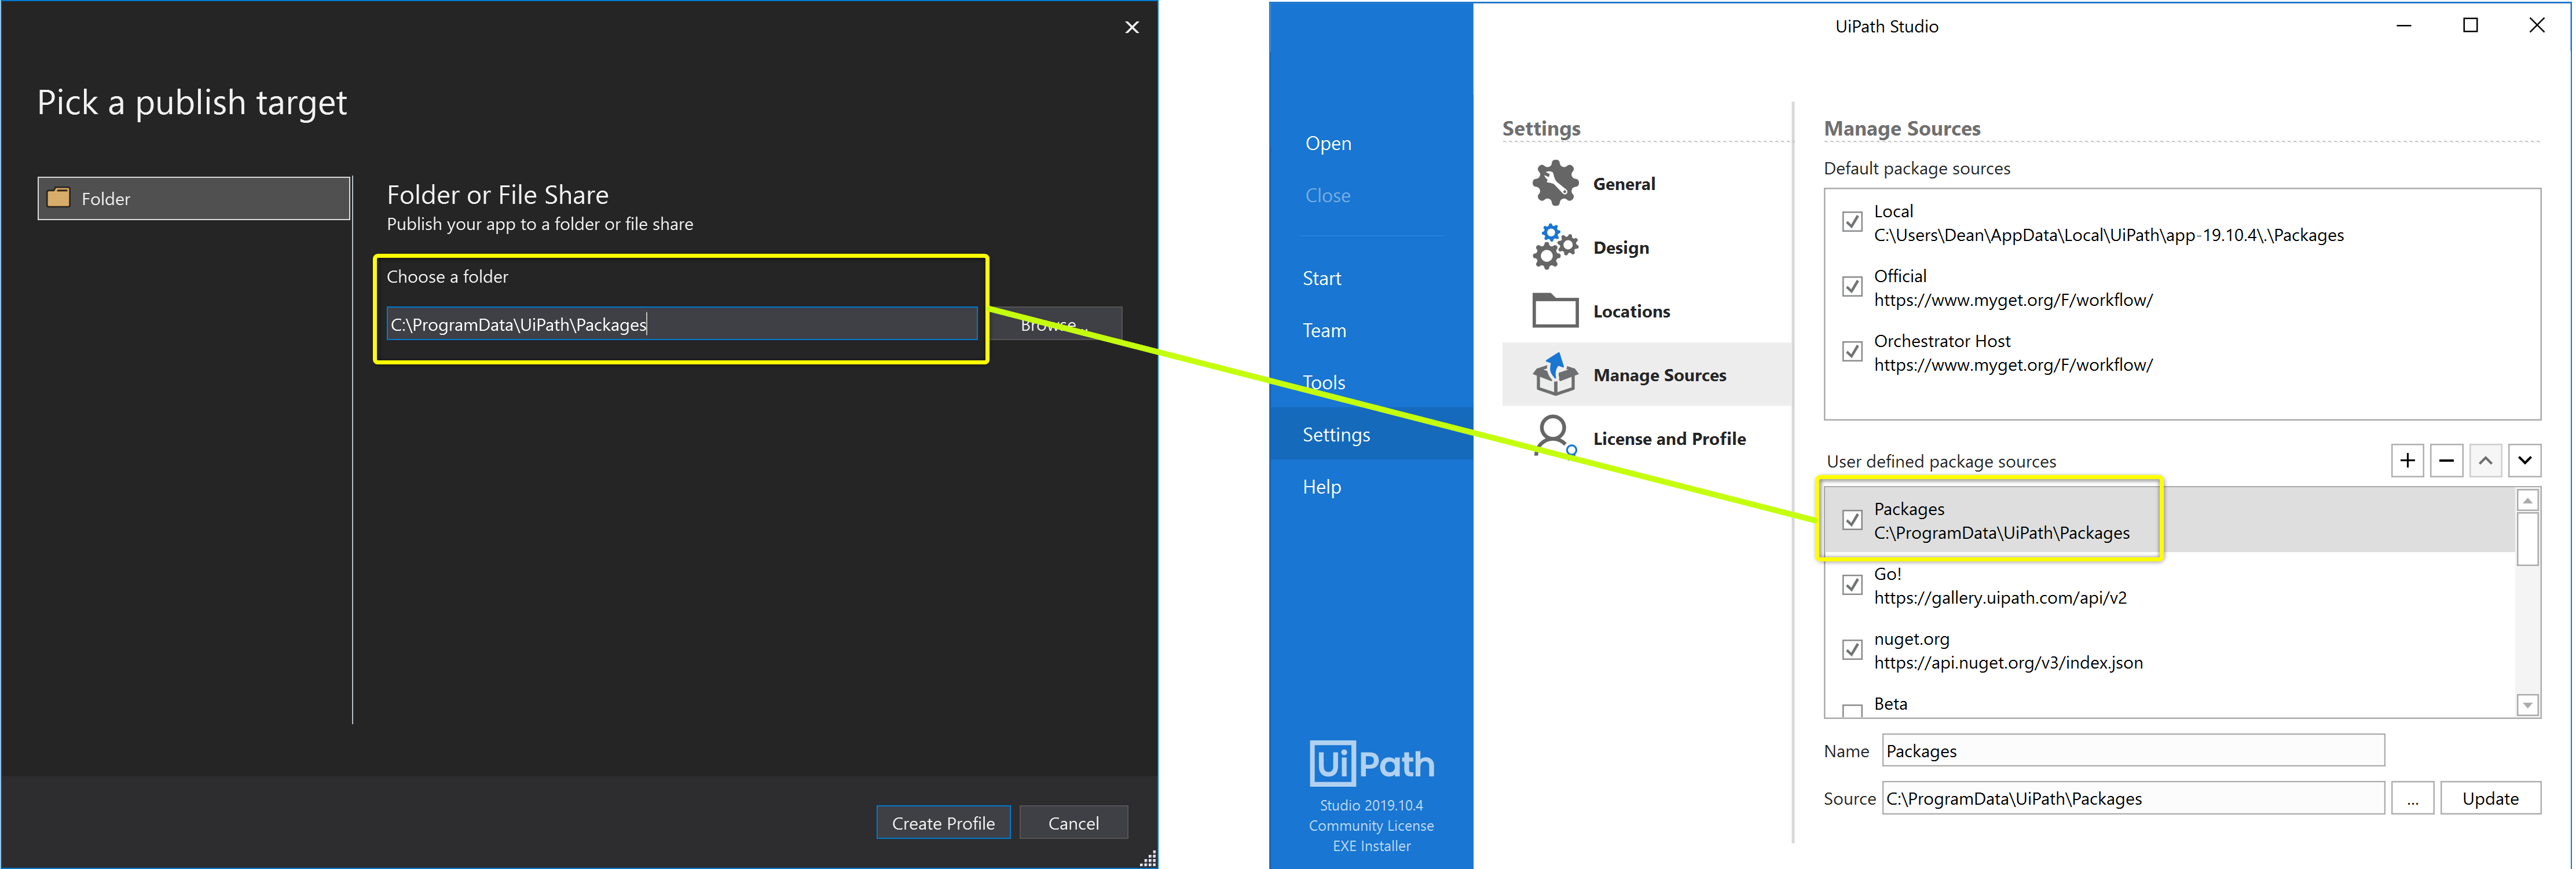
In the next screen, enter the folder in which you'd like to save your activity package. It's a good idea to choose one of your package sources from UiPath Studio (you can find these at Settings > Manage Sources on the Studio homepage) so you can publish directly from Visual Studio into UiPath Studio.
Click Create Profile to continue.
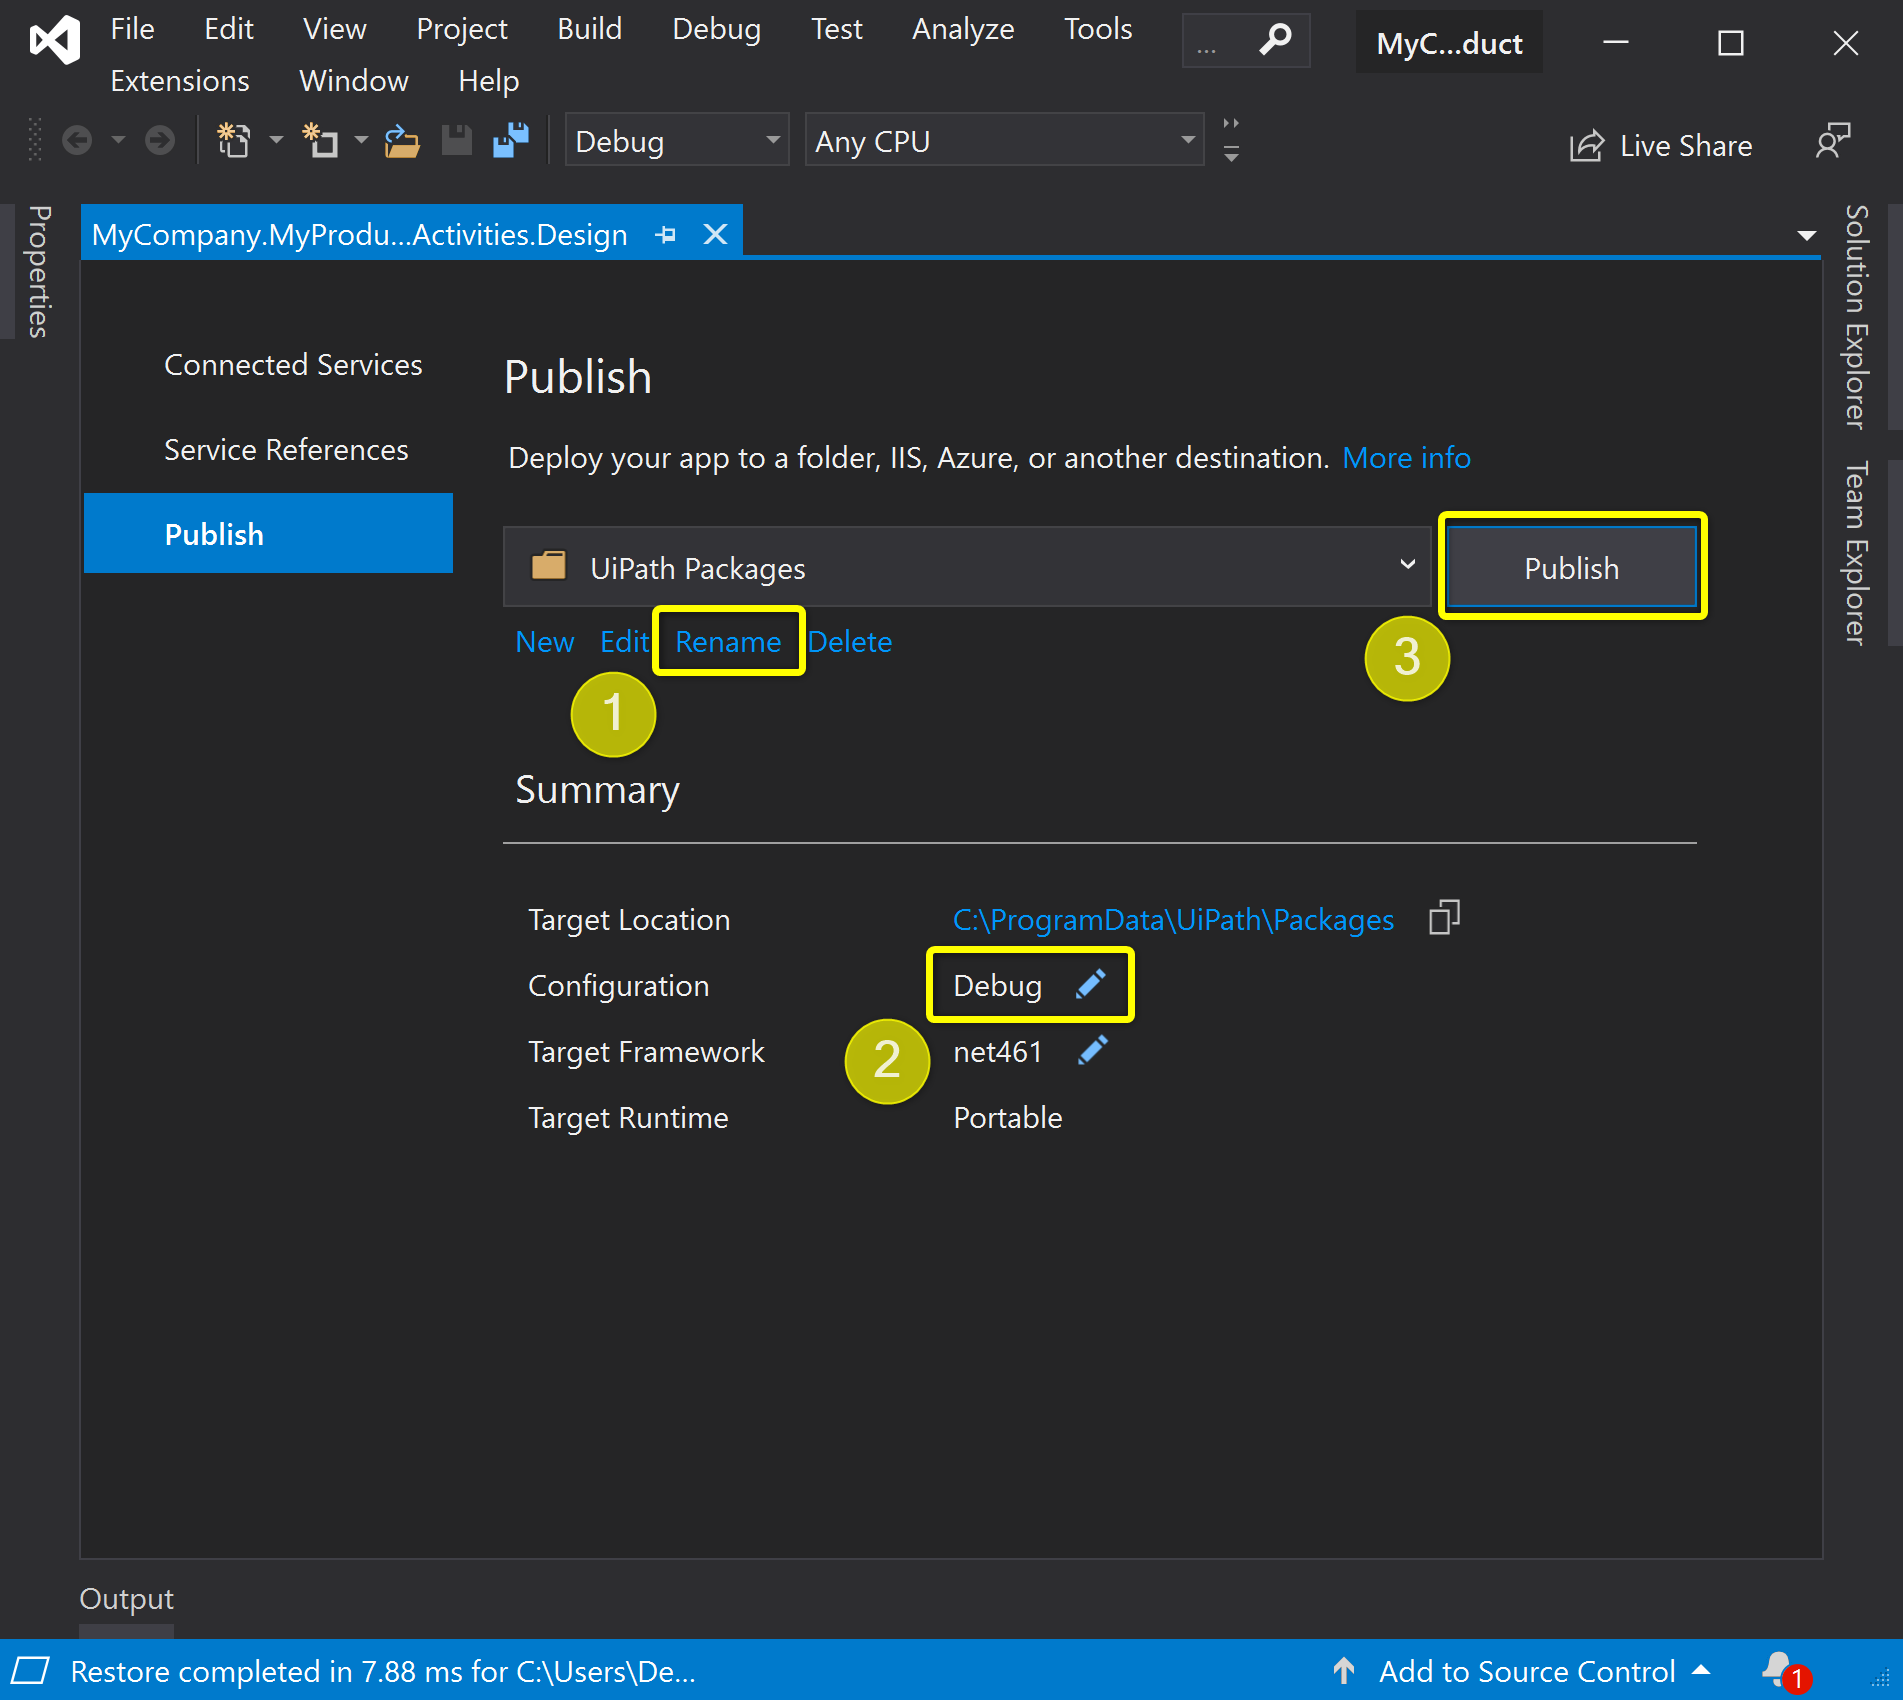
On the next page, rename your package source to UiPath Packages (or whatever you'd like) and change the configuration to Debug. Then click Publish.
For more info on Debug vs Release configurations, see Package Metadata.
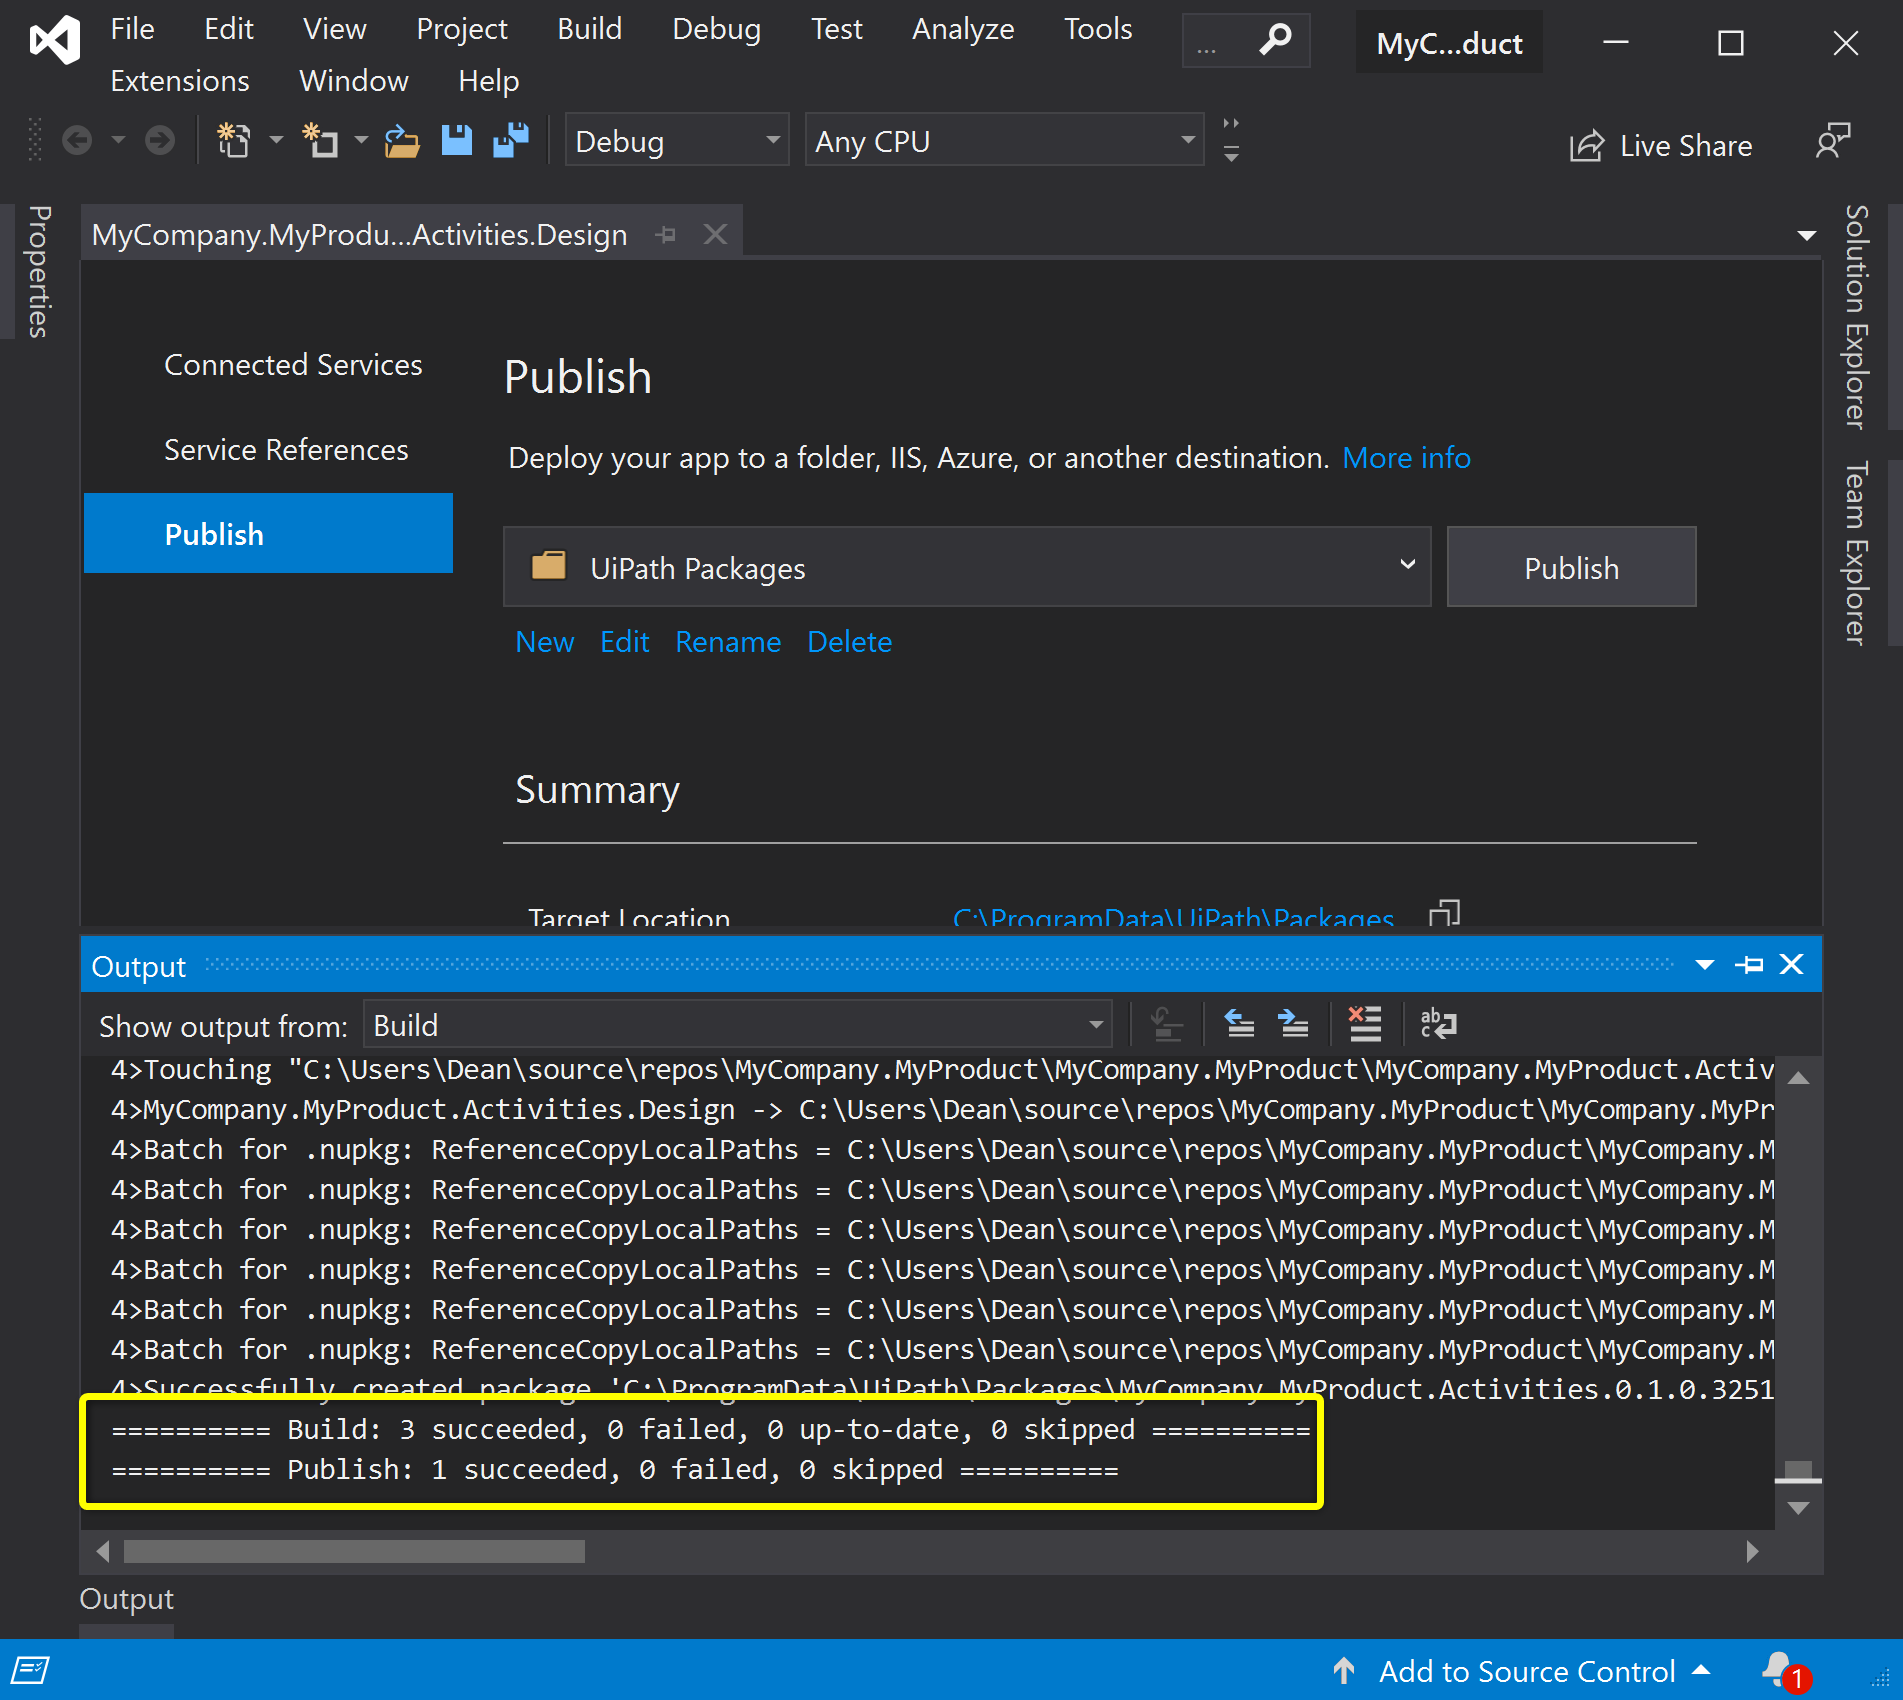
Your output will then show that all three projects have been built successfully and the resultant package published. You now have a working activity package!
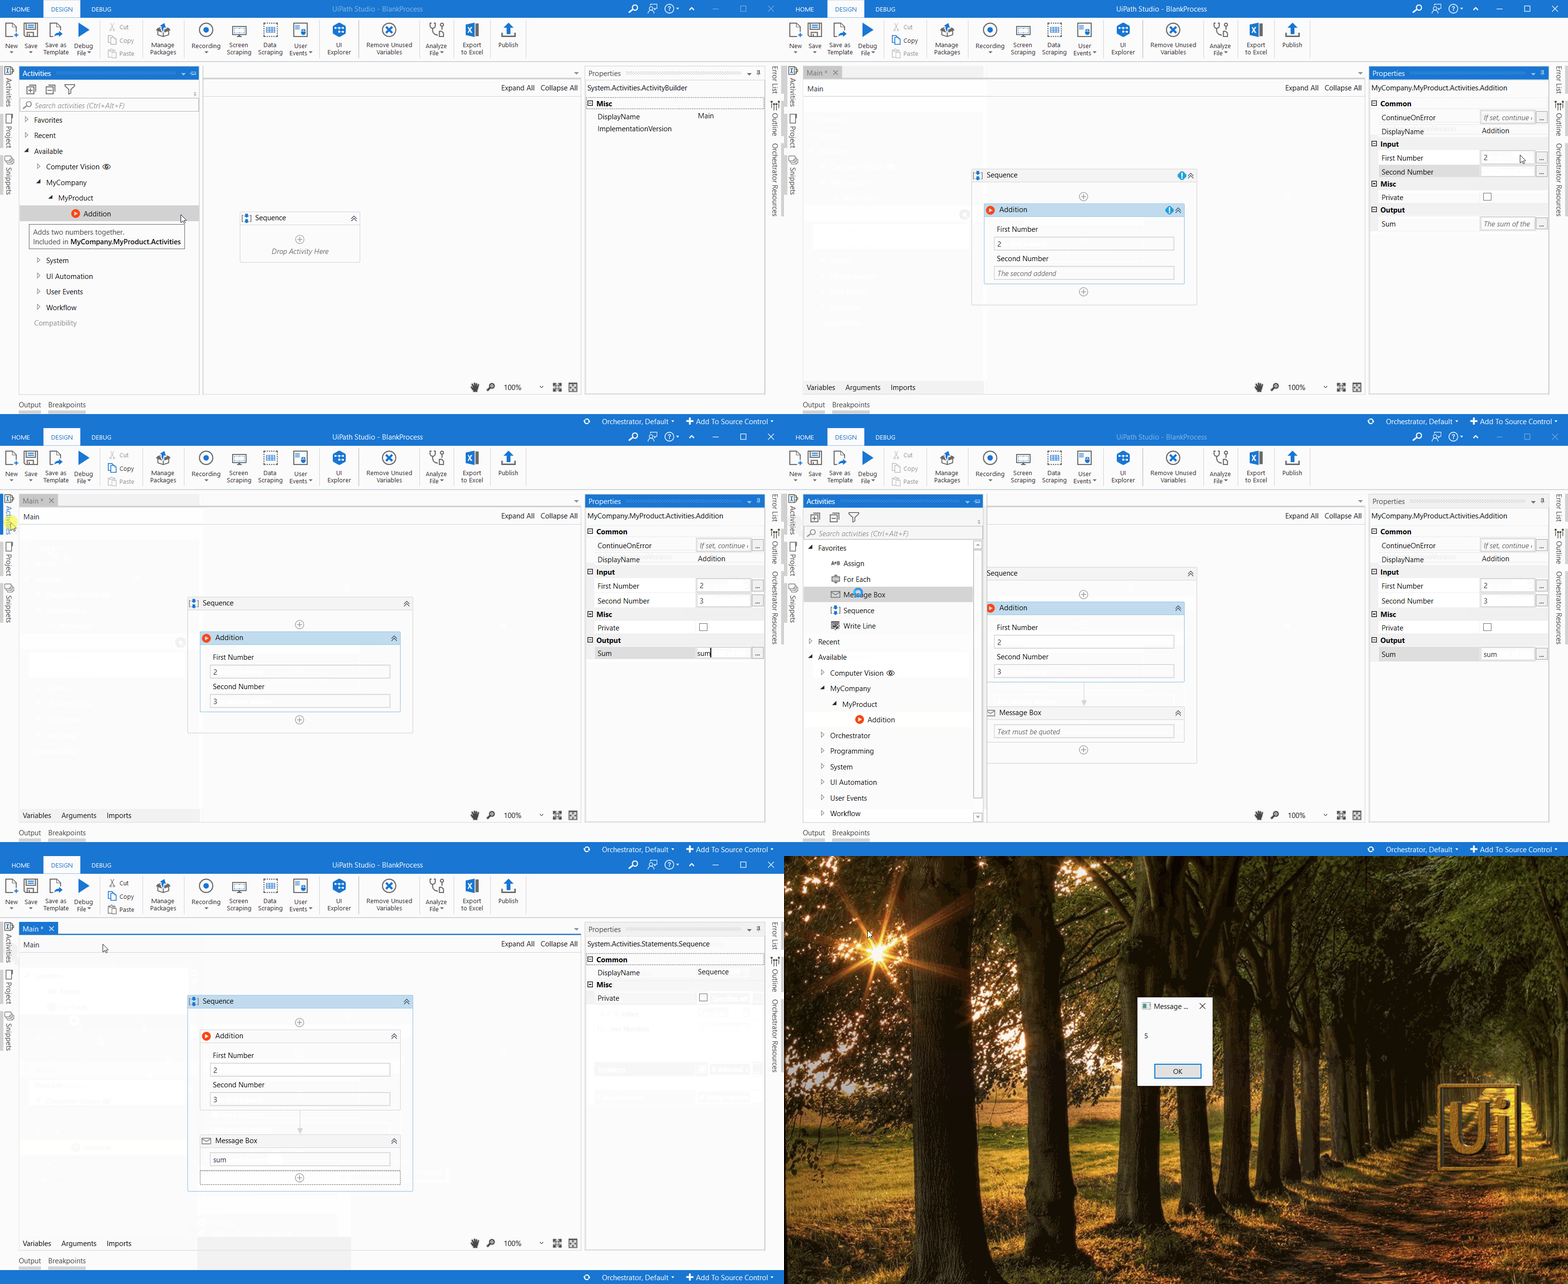
8) Use Your Activities in UiPath Studio
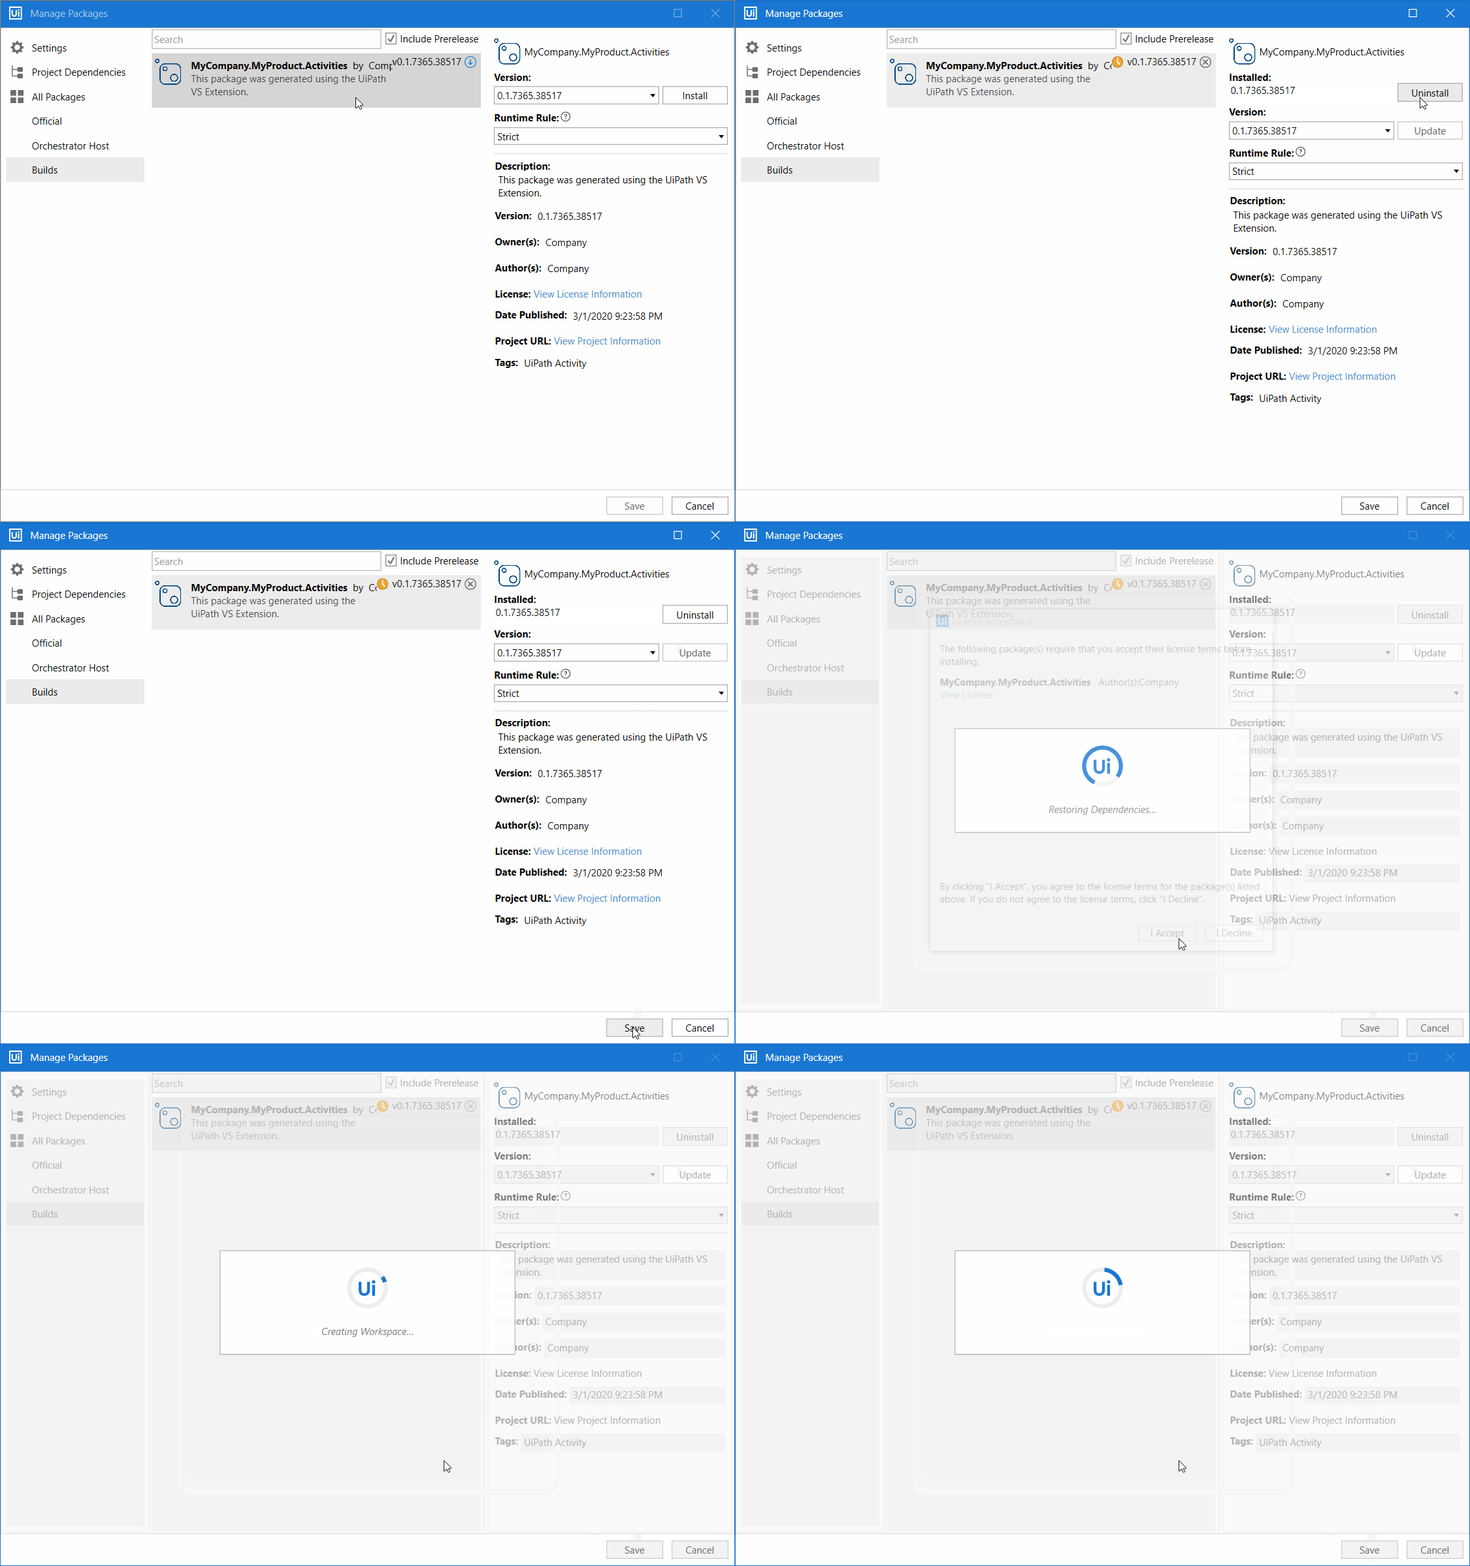
Open UiPath Studio, navigate to the Package Manager, and add your activity set to workflow.
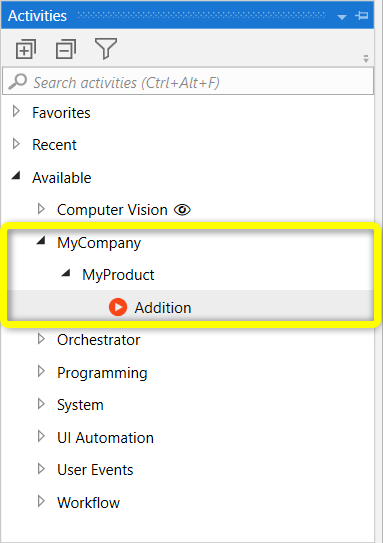
Notice that a new category has been added to the Activities pane.
That's all! Give your new activity a try!
Discussion
Think the marked answer is wrong, or have a better explanation? Share it below — comments appear after review.